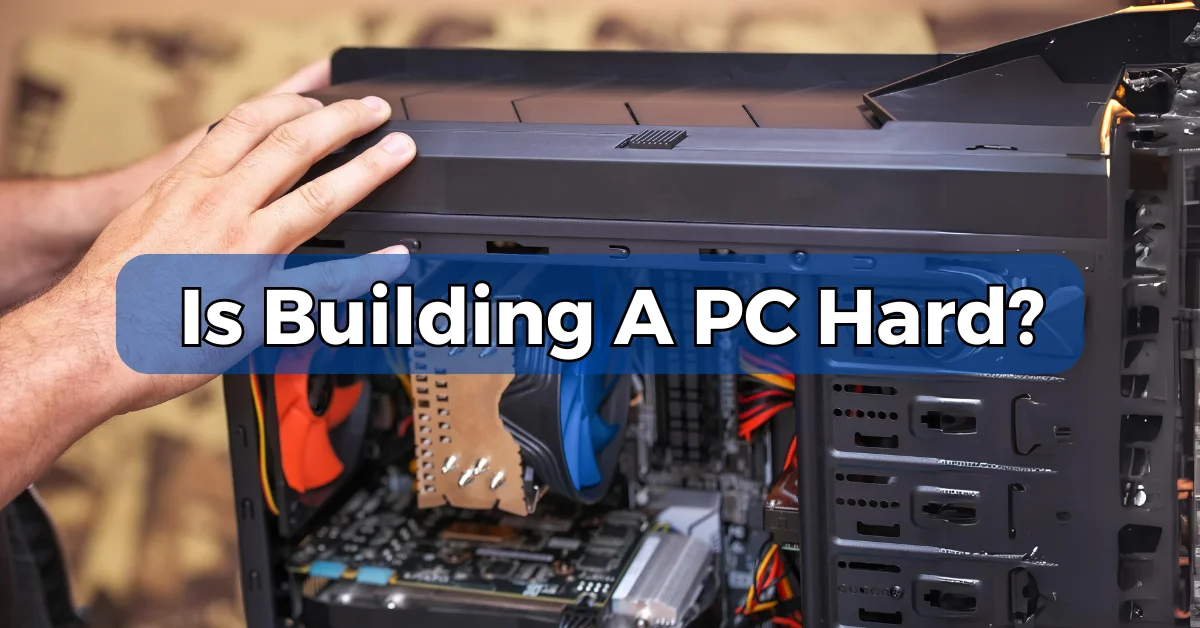
Building a PC is not hard at all, but it requires some planning and research. There are a few things you need to take into account before starting, such as what parts you need, what compatibility issues there may be, and how much money you’re willing to spend.
Once you have a plan, the actual process of assembling your PC is relatively straightforward. Just take your time, read the instructions carefully, and be careful with delicate components.
The Benefits of Building a PC
There are many benefits to building your PC. Perhaps the most obvious is that you will get exactly the system you want, rather than being limited to pre-built options. You’ll also save money by doing it yourself, and the satisfaction of completing a complex project is hard to beat.
So, is building a PC hard? No, it’s not hard. The most challenging part is selecting the right parts and ensuring compatibility. Let’s start with that.
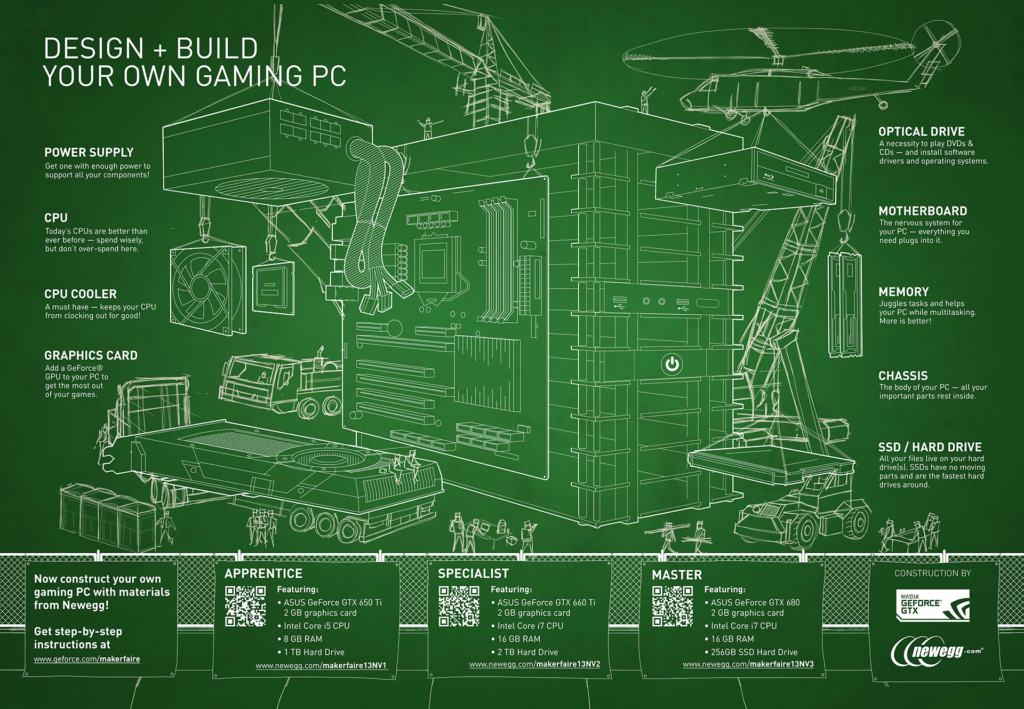
1. Planning Your Build
The first step to building your own PC is deciding what you want. That might sound like a no-brainer, but there are a lot of factors to consider.
The first thing you need to do is figure out what kind of system you want. What will you be using it for? Gaming? Video editing? Casual web browsing? Once you have a general idea of the purpose of your PC build, you can start narrowing down your options.
Next, you need to consider your budget. How much money are you willing to spend? It’s important to be realistic here—don’t try to fool yourself into thinking you can afford a top-of-the-line system when you’re only working with a shoestring budget.
After clarifying your needs and budget, you can start selecting specific components. This is where research becomes crucial.
2. Choosing the CPU

The first part you should choose is the CPU aka Central Processing Unit. This is your computer’s ”brain,” and you should start from the CPU because it will dictate what other parts you can get.
AMD vs. Intel
Two major CPU brands dominate the market: AMD and Intel.
AMD is popular among gamers, while Intel is favored for productivity tasks. Each brand offers pros and cons, so it’s up to your specific needs.
GPU vs. iGPU
If you are on a tight budget and plan to use the PC for light gaming or general productivity, a CPU with integrated graphics (iGPU) will suffice. However, for more intensive tasks like gaming or video editing, a dedicated GPU is recommended.
Then you need to decide whether you will buy a CPU with an integrated graphics card (iGPU) or one that doesn’t have integrated graphics and instead relies on a separate, dedicated GPU that you will buy separately.
Whether you are going to buy a CPU or an iGPU or not depends on two main factors – your budget and what you are going to use your PC for.
If you are on a tight budget and only going to use your PC for light gaming or general productivity tasks, then an iGPU will suffice. Dedicated GPUs are significantly more expensive, and you can save a few hundred dollars by going with an iGPU.
On the other hand, if you have a larger budget and/or planning on doing more demanding tasks like gaming or video editing, you should buy a plain CPU and get a dedicated graphics card.
But how do you know if the CPU you want to buy has integrated graphics?
If you have decided to go with an AMD CPU, then all you need to do is look at the model number. Most AMD CPUs don’t come with integrated graphics, and those that do, have the letter “G” or “GE” at the end of the model number. For example, the popular AMD Ryzen 3 4300G comes with integrated graphics, while the more expensive AMD Ryzen 9 5900X doesn’t.
| CPU Model | iGPU |
|---|---|
| AMD Ryzen 7 5700G | Rx Vega 8 Cores 2.0 GHz |
| AMD Ryzen™ 7 5700GE | Rx Vega 8 Cores 2.0 GHz |
| AMD Ryzen 7 4700G | Rx Vega 8 Cores 2.1 GHz |
| AMD Ryzen 7 4700GE | Rx Vega 8 Cores 2.0 GHz |
| AMD Ryzen 5 5600G | Rx Vega 7 Cores 1.9 GHz |
| AMD Ryzen 5 5600GE | Rx Vega 7 Cores 1.9 GHz |
| AMD Ryzen 5 4600G | Rx Vega 7 Cores 1.9 GHz |
| AMD Ryzen 5 4600GE | Rx Vega 7 Cores 1.9 GHz |
| AMD Ryzen 3 5300G | Rx Vega 6 Cores 1.7 GHz |
| AMD Ryzen 3 5300GE | Rx Vega 6 Cores 1.7 GHz |
| AMD Ryzen 3 4300G | Rx Vega 6 Cores 1.7 GHz |
| AMD Ryzen 3 4300G | Rx Vega 6 Cores 1.7 GHz |
Related Article: Does Ryzen Have Integrated Graphics?
On the contrary, most Intel CPUs come with integrated graphics. The only way to get an Intel CPU without integrated graphics is to buy one of their more expensive “K” or “X” models, designed for gaming and overclocking.
To be 100% sure whether the CPU you want to buy has integrated graphics, you should visit the official product page and read the specs.
Performance Considerations
Both AMD and Intel CPUs offer a wide range of options when it comes to performance.
Again, it’s crucial to think about what you will be using your PC for and choose a CPU that will suit your needs.
If you are only going to use your PC for light gaming and general productivity tasks, then you don’t need to get the most powerful and expensive CPU on the market. A mid-range CPU will suffice.
On the other hand, if you are doing more demanding tasks or want to overclock your CPU, you should get a higher-end CPU.
If you have decided to go with Intel, these are the main series you should be looking at:
- Entry-level: Intel Core i3
- Mid-range: Intel Core i5
- High-end: Intel Core i7
- Enthusiast: Intel Core i9
If you have decided to go with AMD, these are the main models you should be looking at:
- Entry-level: AMD Ryzen 3
- Mid-range: AMD Ryzen 5
- High-end: AMD Ryzen 7
- Enthusiast: AMD Ryzen 9
Related Article: What Is AMD Equivalent To I5?
3. The Motherboard
Remember when I told you that the CPU will dictate what other parts you will get?
Well, the motherboard is one of those parts.
You need to make sure that the motherboard you choose is compatible with the CPU you have chosen.
Socket Type
The socket type is the first thing you need to pay attention to here. The socket type is the physical interface between the CPU and the motherboard.
Different CPU models use different socket types, and you need to make sure that the motherboard you have chosen has the correct socket type for your CPU.
Below is a table that lists the different socket types for the most popular Intel and AMD CPUs:
| Socket Name | CPU Support | Year of Introduction |
|---|---|---|
| LGA 1700 | 12th and 13th Gen. Desktop Intel CPUs | 2021 |
| LGA 1200 | 10th and 11th Gen. Desktop Intel CPUs | 2020 |
| AM4 | All Mainstream Desktop AMD Ryzen CPUs | 2017 |
| LGA 1151 | 7th, 8th, and 9th Gen. Desktop Intel CPUs | 2017 |
Chipset
The second thing you need to pay attention to is the chipset.
The chipset is your motherboard’s “brain.” It’s a small chip that controls how all the core components on your motherboard work and connect. The chipset and the CPU will also dictate the number of PCIe lanes of your computer, thus affecting how many graphics cards or NVMe drives you can install. And also the number of USB port, SATA ports, and every other feature on your motherboard.
| Chipset Name | Socket Support | Year of Introduction |
|---|---|---|
| H610 | LGA 1700 | 2022 |
| B660 | LGA 1700 | 2022 |
| H670 | LGA 1700 | 2022 |
| Z690 | LGA 1700 | 2021 |
| W580 | LGA 1200 | 2021 |
| Z590 | LGA 1200 | 2021 |
| H570 | LGA 1200 | 2021 |
| B460 | LGA 1200 | 2021 |
| H510 | LGA 1200 | 2021 |
| W480 | LGA 1200 | 2020 |
| Z490 | LGA 1200 | 2020 |
| Q470 | LGA 1200 | 2020 |
| H470 | LGA 1200 | 2020 |
| B560 | LGA 1200 | 2020 |
| H410 | LGA 1200 | 2020 |
| X570 | AM4 | 2019 |
| B550 | AM4 | 2020 |
| A520 | AM4 | 2020 |
| X470 | AM4 | 2018 |
| B450 | AM4 | 2018 |
| X370 | AM4 | 2017 |
| B350 | AM4 | 2017 |
| A320 | AM4 | 2017 |
Related Article: Can I Upgrade CPU Without Changing Motherboard? [Solved]
Form Factor
The third and final thing you need to consider is the form factor.
The form factor is the physical size of your motherboard and the most common form factors are ATX, microATX, and mini-ITX.
ATX
ATX is the largest form factor and offers the most features.
It’s usually the best choice for gaming PCs as it gives you ample room to add multiple graphics cards, storage drives, and other expansion cards.
Micro ATX
MicroATX is a smaller version of ATX, and it offers fewer features. It’s a good choice for budget builds or for people who want a smaller PC with fewer features.
Mini-ITX
Mini-ITX is the smallest form factor, and it offers the fewest features.
It’s a good choice for people who want an extremely small PC or for people who want a budget build.
4. Choosing a GPU
As I already mentioned, you can either get a CPU with integrated graphics or get a dedicated GPU instead.
The difference is that a dedicated GPU will offer much better performance than an iGPU, and below you can see a table that compares the two.
| GPU – iGPU Model | Benchmark Score |
|---|---|
| Radeon Ryzen 7 PRO 5750GE | 2,969 |
| GeForce MX350 | 2,870 |
| Radeon Ryzen 7 5700G | 2,837 |
| Radeon Ryzen 5 PRO 5650GE | 2,693 |
| GeForce GTX 465 | 2,679 |
| Radeon Ryzen 7 4700GE | 2,662 |
| GeForce GTX 850M | 2,603 |
| Radeon Ryzen 5 5600G | 2,570 |
| GeForce GTX 650 Ti | 2,555 |
| GeForce GTX 950A | 2,539 |
But keep in mind that dedicated GPUs are also more expensive than iGPUs.
So, it’s important to decide whether you need the extra performance that a dedicated GPU offers or if you can get by with an iGPU.
The other thing you need to decide is the GPU brand you will get.
There are two leading GPU brands: AMD and Nvidia.
Both brands offer various models that range from budget-friendly to high-end.
Generally, Nvidia GPUs have better performance than AMD GPUs but are also more expensive.
I will not get into more details here as that would be beyond the scope of this article. So, do your research and decide which brand and model you want to get.
Related Article: Can You Use An Nvidia Graphics Card With An AMD Processor?
5. RAM

When it comes to RAM, the first thing you should check is what kind of RAM your motherboard supports.
To do that, you should check the specifications of your motherboard on the manufacturer’s website.
There are four things to check: the type of RAM, the maximum capacity, the number of slots, and the maximum frequency.
Type Of RAM
The most common types of RAM are DDR4, but there are other types such as DDR3 and DDR5. Make sure to choose a compatible RAM type because RAM sticks are not cross-compatible.
Maximum Capacity
The maximum capacity is the maximum amount of RAM your motherboard can support.
For example, if your motherboard has a maximum capacity of 32GB, you can install up to 32GB of RAM. At this point, you should be smart and not buy a motherboard that will just support the amount of RAM you want to install at that moment. You should also factor in any plans for future upgrades and make sure your motherboard will be able to handle those as well.
Number Of Slots
The number of slots is pretty self-explanatory. It’s the number of slots on your motherboard that you can insert RAM into. Most modern ATX motherboards will have 4 RAM slots.
Maximum Frequency
Finally, the maximum frequency is the maximum speed that your RAM can run at.
For example, if your motherboard has a maximum frequency of 3200MHz, you can get RAM that runs up to 3200MHz.
Now that you know how to choose a compatible RAM, you next must decide how much RAM you need.
The amount of RAM you need depends on what you will use your PC for.
If you are just going to use it for browsing the web or doing light productivity work, then 8GB of RAM is more than enough.
However, if you use your PC for gaming or other demanding tasks, then 16GB of RAM is a good choice.
You can also get 32GB of RAM or more, but it’s not necessary unless you do things like video editing or other resource-intensive tasks.
6. Storage

The next thing you need to decide is what kind of storage you will get.
The most common types of storage modern motherboards support are HDDs, SATA SSDs, M.2 SSDs, and NVMe M.2 SSDs.
HDDs
HDDs are the oldest and least expensive type of storage, but they are also the slowest, with a transfer rate of around 150MB/s.
SATA SSDs
SATA SSDs are faster than HDDs with a transfer rate of around 550MB/s, but they are not as fast as NVMe SSDs. They are the most common type of SSD, and most modern motherboards come with at least three SATA ports to connect the SATA data cables.
M.2 SSDs
M.2 SSDs are the same as SATA SSDs but are different form factors. M.2 drives are smaller and more flexible than SATA drives but have the same transfer rate.
NVMe M.2 SSDs
NVMe M.2 SSDs use the PCIe bus instead of the SATA bus and have a transfer rate of up to 3,938MB/s for a PCIe 3.0 slot and 7,877MB/s for a PCIe 4.0 PCIe slot.
They are the fastest type of storage, but they are also the most expensive.
Related Article: Does My Motherboard Support Nvme SSD?
The last thing you need to decide is how much storage you need.
If you are just going to store a lot of things like music or movies on your PC, then a 250GB SSD is enough.
However, if you use your PC for gaming or other storage-intensive tasks, then a 500GB or 1TB SSD is a good choice.
Now that you know the different types of storage and how much you need, you next must decide what kind of storage you want.
I think getting an NVMe SSD for booting, and a SATA III for mass storage is the best option. This way, you will get the fastest possible SSD for booting your OS and applications and a larger SATA SSD for storing your documents, movies, and other files.
7. Power Supply

The power supply unit (PSU) is one of a PC’s most essential and underrated parts.
A PSU is responsible for providing power to all the components in your PC, and it’s important to get a good one because a bad PSU can cause all sorts of problems.
The most important thing to pay attention to when choosing a PSU is to select a one with a wattage of at least 20% higher than you need.
But how do you know how much wattage you need?
There are many ways to do it, but the most accurate way to calculate the wattage you need is to use a power consumption calculator like this one.
Just enter all your PC components, and it will tell you how many watts you need.
Another thing to look for when choosing a PSU is the 80+ rating.
This is a measure of efficiency, and getting a PSU with at least an 80+ rating is important because it will use less power and generate less heat.
Finally, you need to choose the correct form factor for your PSU.
You should simply choose a form factor compatible with your PC case.
The most common form factors are ATX, SFX, and SFX-L.
Related Article: What Power Supply Do I Have? [Solved]
8. The PC case
The final piece of the puzzle is the PC case.
The PC case is what houses all the components, and it’s important to choose a PC case that is compatible with your motherboard.
As I told you before, the three most common form factors are ATX, microATX, and mini-ITX.
The majority of PC cases support ATX motherboards, but there are also smaller cases that support only microATX or mini-ITX boards.
When choosing a PC case, you must also decide on the size. The most common sizes are mid-tower, full-tower, and mini-ITX.
- Mid-tower cases are the most popular because they offer a good balance of size and expandability.
- Full-tower cases are the largest and offer the most expansion options but are also the most expensive.
- Mini-ITX cases are the smallest and most affordable, but they don’t offer as much expandability.
Now that you know all the parts you need to build a PC, it’s time to put it together.
How to Build a PC?
Building a PC is not that difficult, and I will show you how to do it step-by-step.
I know that most of you would like a video tutorial, and I will eventually make one. But till then, you can watch this in-depth and helpful video.
For those that prefer written instructions, keep reading.
Just follow these simple steps, and you’ll have your PC up and running in no time.
- Study the motherboard manual. The motherboard’s manual is like a map, showing you where everything goes. So, read it thoroughly and keep it close by when you are building your PC.
- Install the motherboard standoffs. These are special screws that elevate the motherboard off the floor of the case, and they come with most cases. If your case doesn’t have them, you can buy them separately. Just screw them into the pre-drilled holes in the case until they are tight.
- Install the CPU. Open up the CPU socket and insert the CPU into it. Then close the socket and secure it with the latch. Be careful when doing it and watch a video on how to properly do it because CPUs are very sensitive, and you don’t want to damage them.
- Install the RAM slots. Open up the latches on each side of the slot and insert the RAM sticks. Then close the latches to secure them in place.
- Install the M.2 SSD. Remove the screws from the SSD slot on the motherboard and insert the SSD into it. Then screw it in place.
- Install the CPU cooler. The most important thing to do here is to apply thermal paste to the CPU before installing the cooler. The thermal paste helps conduct heat from the CPU to the cooler. Just apply a small amount of it to the center of the CPU and then install the cooler according to the instructions that come with it.
- Install the PC case fans. Remove the screws from the fan slots on the case and insert the fans. Then screw them in place. You should not connect the cables yet; just leave them hanging.
- Place the motherboard into the case. Line up the motherboard holes with the standoffs and lower it down into the case. Then secure the motherboard to the case. Just use the screws that came with the case and screw them into the standoffs.
- Install the PSU. Remove the screws from the PSU slot on the case and insert the PSU. Then screw it in place. Do not connect the motherboard cables yet; just leave them hanging.
- Mount the SSDs. The next step is to mount the SSDs in the case. Just remove the screws from the SSD slots on the case and insert the SSDs. Then screw them in place.
- Plug in your GPU. Insert your GPU into the PCIe x16 slot. Make sure that you firmly press it in to make good contact.
- Connect the cables. The final step is to connect all the cables. Start with the motherboard and CPU power cables. If you got a SATA disk or a dedicated GPU, connect the SATA power cable and PCIe power cable as well. Finally, connect all case fans, the USB headers, and the front panel connectors. When connecting the cables it is vital to do proper cable management, because if you leave a mess of cables inside your case, it will impede airflow and lead to overheating. To do that use cable ties or velcro straps to bundle cables together and route them behind the motherboard tray.
- Now that all the cables are connected, you can go ahead and close up the case. Make sure that all the screws are tight and that there are no loose cables inside the case. Congratulations, you have now built your first computer!
That’s it! You are now ready to power on your PC and start using it.
FAQs
Is It Worth Building A PC?
Yes, it is definitely worth building a PC. Not only will you save money, but you’ll also be able to get exactly the parts you want and need. You’ll also have the satisfaction of knowing that you built it yourself.
What Is The Hardest Part Of Building A PC?
The most challenging part of building a PC is planning. You need to ensure that you have all the parts and that they are compatible. You also need to decide what kind of PC you want to build. But once you have all that figured out, the actual building process is quite easy.
How Long Does It Take To Build A PC?
It takes around 1-2 hours to build a PC. But please don’t try to rush it. Take your time and make sure that everything is done correctly.
Conclusion
This was a long and detailed guide, but hopefully, it was helpful. Building a new PC can be a rewarding experience, and it’s not as hard as it may seem at first. Just take your time, carefully plan everything out, and don’t hesitate to ask for help if you need it. With a little bit of patience and effort, you can end up with a great custom-built PC that will serve you well for many years to come. Thanks for reading!

