Resetting your CMOS is something you won’t do very often, but if you ever need to, it’s good to know-how. This process will clear any overclocking or BIOS settings that you may have made, so if you’re experiencing any problems, it’s a good place to start.
There are several ways to reset your CMOS, and I am going to give you instructions for the most common ones. But before we get started, let’s talk about the reasons you might want to reset your CMOS.
Why reset the CMOS
If you have decided to reset your CMOS, it’s because something is not working right, and you hope that resetting the settings will fix the problem. There are many reasons to do so, and it’s important to narrow down the problem as much as possible before resetting the CMOS, so let’s talk about some of the most common reasons for resetting:
1 Failed Overclocking
This is the number one reason to reset the CMOS. If you have overclocked your CPU and your computer is unstable, resetting the CMOS will return everything to its default speed. There are many reasons why overclocking can fail, but the most common one is pushing your CPU too hard. So if you have overclocked and things are not working right, reset your CMOS.
2 Added A New Hardware Component
If you have recently added a new piece of hardware to your computer and it’s not working right, resetting the CMOS is often the first troubleshooting step you should take. It’s possible that the new hardware is not compatible with your motherboard, or there may be a conflict with other components. So if you have added something new like a GPU and things are not working right, try resetting the CMOS.
3 You Have Changed The BIOS Settings, And Your PC Isn’t Working
This is a less common reason, but if you have changed some BIOS settings and your PC stopped working, resetting the CMOS is often the best way to fix it. If you have changed a setting without knowing what it does or forgotten what settings you changed, it can cause problems. No matter the reason, resetting the CMOS will return all the settings to their default values.
4 Computer Won’t POST (Power-On Self-Test)
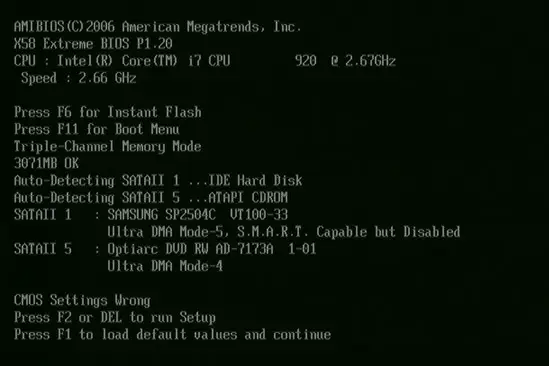
The POST is a diagnostic test that runs when you turn on your computer. It checks to see if all the hardware is working properly. If your computer doesn’t POST, it’s possible that the CMOS is corrupted. Resetting the CMOS will often fix this problem.
5 Computer Won’t Boot Into Windows
If your computer doesn’t boot into Windows, it could be because of a corrupt BIOS or another hardware issue. If you’ve tried all the other troubleshooting steps and nothing has worked, resetting the CMOS may be the last resort.
Related Article: How To Tell If Your Motherboard Is Bad
How to Reset Your Motherboard [CMOS]
No matter the reason, if you’ve decided to reset your CMOS, there are a few different ways to do it. And this is what we are going to talk about in this section, but before we get started, let’s see what happens when you reset your CMOS.
Related Article: How To Identify BIOS Chip on Motherboard
What Does Clearing The CMOS Do?
The CMOS, aka Complementary Metal-Oxide Semiconductor, is a chip on your motherboard that stores all the BIOS settings. When you reset the CMOS, the settings are cleared and returned to their default settings. So if you have overclocked your CPU or changed any other BIOS settings, they will be reset. Now that we have talked about what happens when you reset CMOS, let’s talk about how to do it.
1. Motherboard Reset BIOS Button
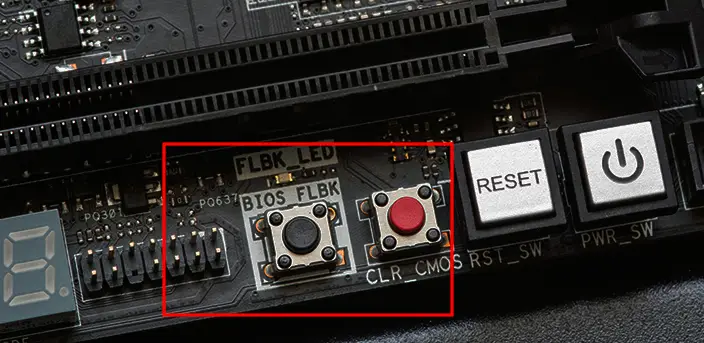
This is a really easy way to reset your CMOS. If your motherboard has a reset button (only high-end motherboards have this button), here is what you need to do:
- Turn off your computer and unplug it from the power outlet.
- Press the power button and hold it for 15 seconds to discharge the capacitors.
- Find the reset button on your motherboard (look at the manual to find its location).
- Press it with your finger and hold it for 10-15 seconds (Before you touch your motherboard, make sure you discharge any static electricity from your body by touching a metal object like a radiator).
- Now turn on your computer and check if the problem is fixed.
2. Case BIOS Reset Button
If your case has a reset button (not all cases have this button), here is what you need to do:
- Turn off your computer and unplug it from the power outlet.
- Find the reset BIOS button on your case (usually, it’s near the power button).
- Press it with a pen or something and hold it for 10-15 seconds.
- Now turn on your computer and check if the problem is fixed.
3. Reset BIOS Settings
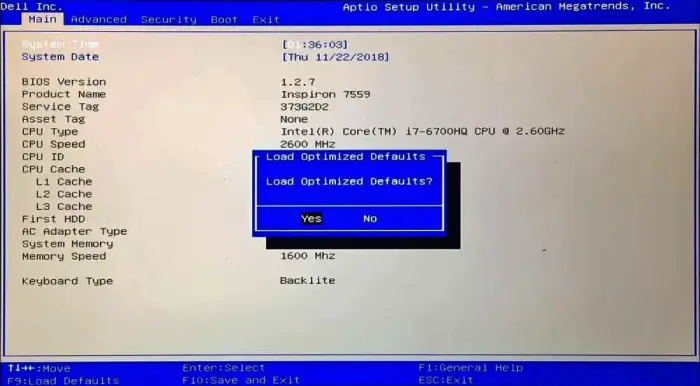
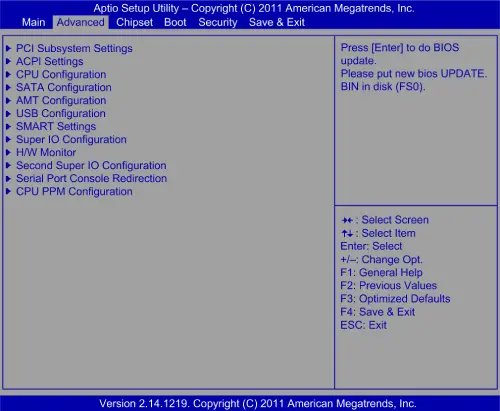
If your computer is booting into BIOS, you can reset it from there. Here is what you need to do:
- Start or restart your PC. When the first screen appears, look for a key that you can repeatedly press to enter BIOS (The key is usually F2, F10, Esc, or Del).
- When you are in BIOS, look for an option in the BIOS menu that says “Load Defaults” or “Restore Defaults.”
- Save your changes and exit BIOS.
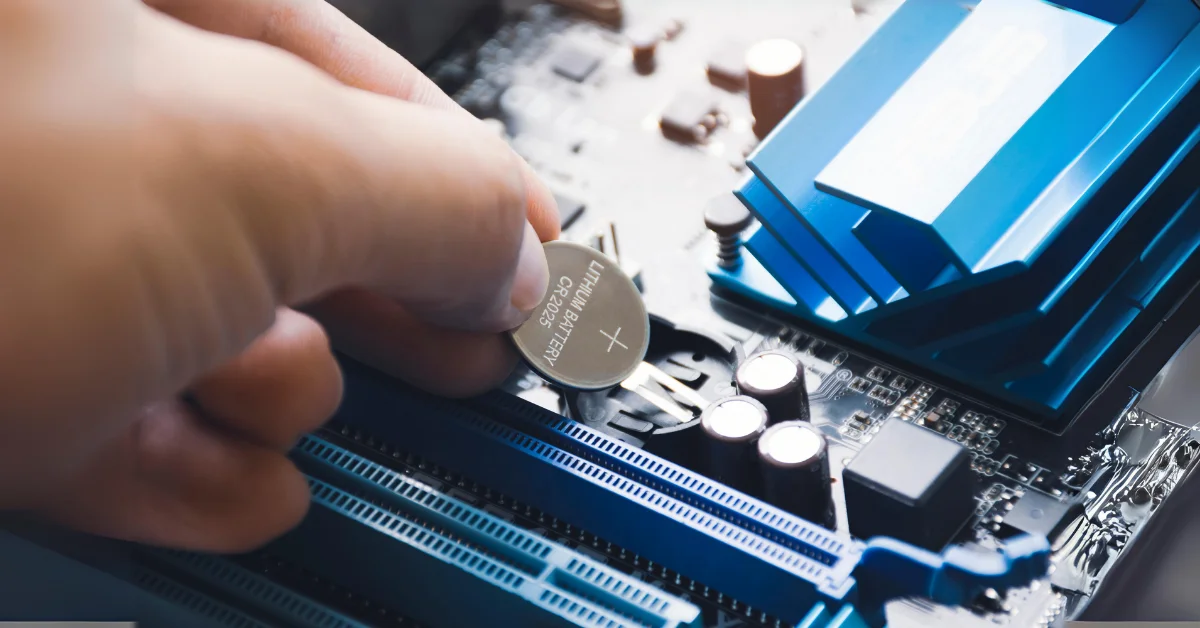
4. CMOS Battery method
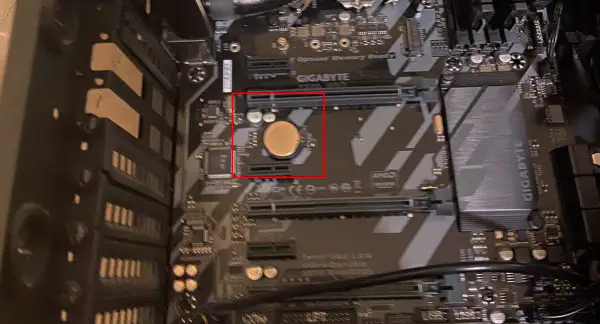
This is a bit more difficult way to reset your CMOS because you have to do more than just press a button. Let’s see in simple steps what you need to do:
- Turn off your computer and unplug it from the power outlet.
- Press the power button and hold it for 15 seconds to discharge the capacitors.
- Find the CMOS battery on your motherboard; it looks like a small coin and is usually close to the PCIe slots.
- Remove the battery. The battery will be secured with a clip, be gentle when removing it, and try not to break the clip.
- Wait for 10-15 minutes, then put the battery back in its place and secure it with the clip.
- Now turn on your computer and check if the problem is fixed.
To check if the CMOS was reset successfully after using this method, go into BIOS and check the date and time. If you get an error message saying that the time is not set, that means the CMOS was reset successfully.
5. Motherboard Jumper Method
This is another difficult way to reset your CMOS. Here is what you need to do:
- Turn off your computer and unplug it from the power outlet.
- Push the power button and hold it for 15 seconds to discharge the capacitors.
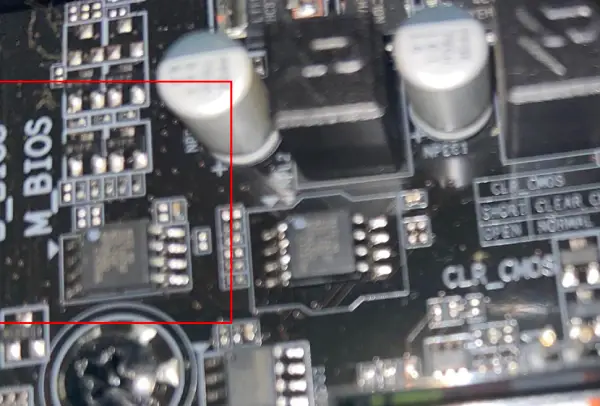
- Find the CMOS jumper on your motherboard. To locate the jumper, look in your motherboard manual or look directly on the motherboard that shows you where the jumpers are. They will be labeled as “CMOS” or “CLR”. They are usually near the CMOS battery. The jumper will be a 2 or 3-pin connector with a plastic cover over it.
- If it is a two-pin configuration, remove the plastic cover and use a metal object like a screwdriver to shorten the jumper by connecting the two pins for a couple of seconds.
- Move the plastic jumper to cover the middle and the previously uncovered pin if it is a three-pin configuration. This will connect the two pins and reset the CMOS.
- Wait for a couple of minutes, then move the jumper back to its original position.
- Now turn on your computer and check if the problem is fixed.
Resetting Motherboard FAQ
Is There A Reset Button On A Motherboard?
Not all motherboards have a reset button, but most high-end motherboards do. Check your motherboard’s manual to see if it has one.
Is It Safe To Reset The Motherboard?
Yes, it is pretty safe to reset the motherboard. When you reset the motherboard, all you are doing is resetting BIOS to its factory defaults. This will not delete any files or damage your computer in any way.
Will Clearing The CMOS Delete My Files?
No, clearing the CMOS will not delete any files on your computer. It will only reset the BIOS settings to their default. Your computer files are stored on your hard drive, which has nothing to do with the BIOS.
Conclusion
Now you know all the different ways to reset your CMOS to the BIOS defaults. Choose the easiest method for you and reset your BIOS/CMOS. If you still have questions, feel free to leave a comment below.

